
*If Nevvon is integrated into your agency's AMS (Agency Management System), the Locations and Sub-locations will be created automatically based on the info in your AMS, and you will not be able to add or edit them directly in Nevvon. Add the required Locations and Sub-locations to your AMS and the data will be imported into Nevvon automatically.
To manually Add a Location (on a non-integrated panel):
1. Click on Settings on the left menu.
Then click on the Locations tab.

2. Click + New Location.

3. Name the New Location and click Save.

4. The new location will now show in your Location list.
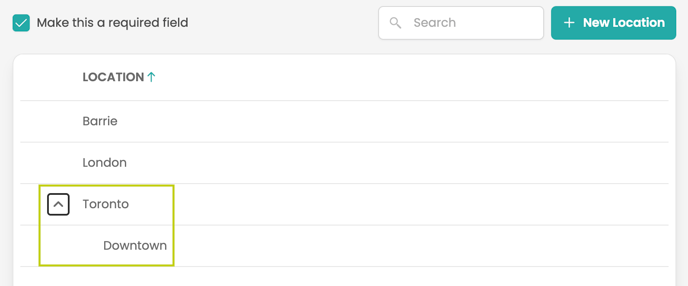
You can make Location a required field by clicking the checkbox. This means a profile can't be manually created without a location.

You can override the agency name that will appear on the certificate. To do so, enter the alternate agency name in the field "Certificate Override Name". Now this agency name will appear on all certificates for this particular location.

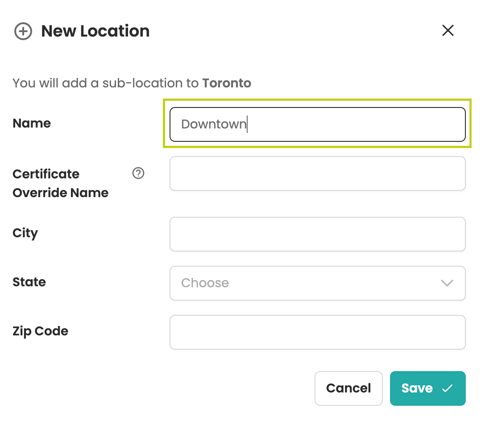
To Add a Sub-Location (on a non-integrated panel):
1. Hover over the Location you wish to add a Sub-Location for. Click the + icon. 
2. Name the new Sub-location and click Save.
Click on the arrow next to the Location name to view the Sub-location.
To Edit a Location (on a non-integrated panel):
1. Hover over the Location you want to Edit. Click the Edit icon.

2. Edit the Name of the Location and click Save.

To Remove a Location (on a non-integrated panel):
1. Hover over the Location you want to remove. Click the Remove icon.

2. To complete the removal, click Confirm.

Only Admin Users with Manager or Admin RN level access can view the Locations tab.